
Successful internet marketing often requires great strategy. The determining factor in how companies fare in the online marketplace depends on the strategy or strategies that they use.
In the online world it is much easier, and cheaper to build a successful product or company using just one strategy or tactic.
Examples include content marketing, growth hacking, and social media. A company can create a large following by using just one social media site, like Pinterest to showcase their products.
Of course we have to keep in mind every company is different from the next, and has its own unique set of challenges and strengths.
The important thing to keep in mind is not the specific tactic you use, but that you build your marketing on a solid foundation. Like your house, or any house for that matter a strong foundation allows you to build on the house well into the future. With that being said I want to help you start to build that foundation by showing you how to create a Google+ Business Page.
What do you need to create a Google+ Business Page?
To create your Google+ Business Page, you need a Google account such as Gmail or Youtube, and you also need to create a Google+ profile. Creating a Gmail account is pretty easy and chances are you already might have one. To create a Google+ profile sign into your Google account and click on the +You option on the far left corner and complete the sign up.

Step 1
Go to your Google+ profile page and click or hover over the home option on the left. From the tab that appears click on the Pages option.
Step 2
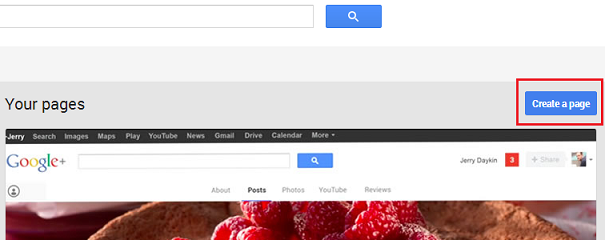
Next you will be taken to a page advertising Google+ Pages. To begin the setup, click on the “Create a page” button.
Step 3
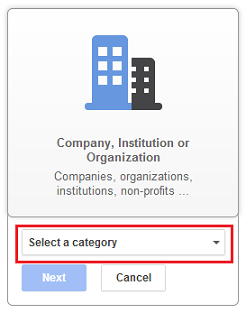
Next is the first step in Google’s 3 step process to creating your page. In this step you select which type of business page you want. Choose the third option, since we are creating a page for your business or company. The other two are for local businesses, and product or brand pages.

Step 4
The next step in the process is to select a category for your business. For example, “Marketing Agency” would be an appropriate category for clientflare.
Step 5
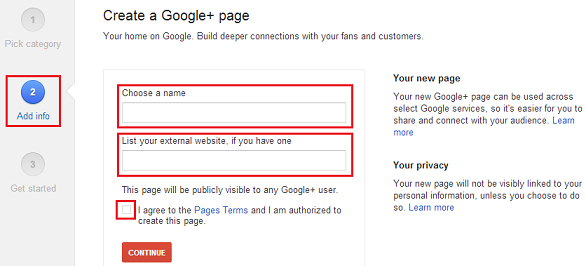
Once you have chosen a category, you proceed to step 2 in Google’s setup which is the “Add info” section. In the first field you choose a name for your page. Since you are creating this page for your business, you should probably use your official business name. In the second field you enter the URL of your website if you have one. If you are ready to move forward, go ahead and agree to the terms of service and click continue.
Step 6
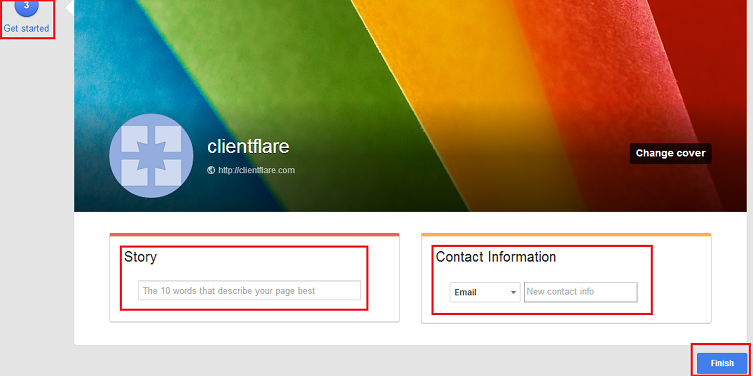
In this next step you have to complete two important fields. In the first field you have to write a brief 10 word description about your business. This will be the tagline for your page. Try to write a description that highlights what your business does and also fits into the overall theme of your brand. You can use one or two keywords to help potential customers connect you with your field. It is important to note that your tagline will also show up in search results as the meta description tag for your Google+ Business Page.
In the second field in this step you get to choose your contact information. You can select to use a phone number or email. After you make your selection click finish.
Step 7
Once you have finished with the previous step you are taken to the “About” section of your business page. As you can see there are four main sections that appear in the “About” section of your business page. These sections which are indicated by the red boxes are titled, People, Contact Information, Story, and Links.
In the “People” section there are two areas that indicate how many people are in your circles (this is like your followers in Twitter, and fans in facebook), and how many people have you in their circle. As you grow your page and engage with others both of these will hopefully grow.
In the “Contact Information” box is the contact information you entered in the previous step. If you need to verify your email click on the “Verify” link indicated by the blue arrow.
In the “Story” section is your tagline from step 6, and an introduction for your page. Since you already filled in the information for the tagline, go ahead and fill in an introduction. Make sure you include some links back to your website in your introduction. These links are also Dofollow links, so make sure you take advantage of the opportunity.
The “Links” section is where you can add any additional links. The green arrow indicates where the link for the homepage of your website should go. The yellow arrow indicates where your additional links should go. Examples of links you can add here are links to your facebook business page and twitter account.
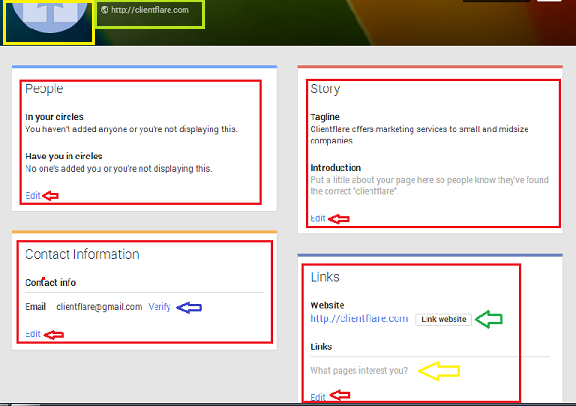
Notice that in the four red boxes there are red arrows in the bottom left corners that point to a link you can use to edit any of the information contained in the four sections at any time. So if you don’t have an introduction ready now, or you are not sure which email you want to use, don’t worry you can update or change your information at any time.
There are two other parts of this page that I want point out. First, in the yellow box in the top left corner is light blue half circle (sorry the top half didn’t make the cut). This circle is where the profile picture (probably best to use your logo) for your page would appear. You can simply click on the circle to change or choose a new image whenever you are viewing any one of the tabs of your business page such as the “About” or “Posts” tabs.
in the second light green box is the link to your website.
Additional Information
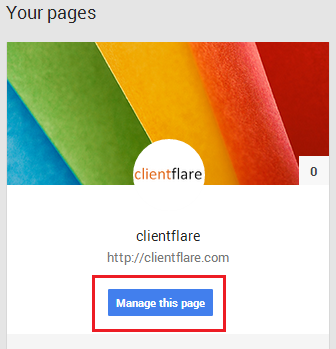
Congratulations you now have your own Google+ Business Page for your company. Whenever you want to access or edit your page simply sign into your plus profile and select “Pages” like you did in “Step 1”. Now that you have created your business page you will see a screen you can select your plus business page from. Just click on the “Manage this page” button to manage your page.
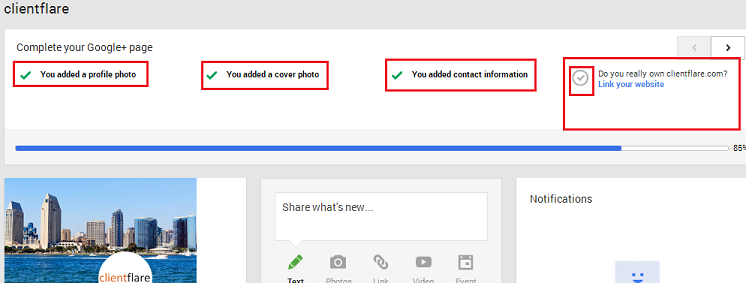
If you are missing any information or parts of your page, don’t worry Google will probably let you know. In the image below you can see the green check marks indicating what is finished, and the missing check mark in the last box on the right indicating that field has yet to be completed.
Have you created your Google+ Business Page yet? If not, then you might want to consider getting started. Let me know if you find these steps helpful.
Image courtesy of [scottchan / FreeDigitalPhotos.net

Leave a Reply