As you browse your favorite blogs and sites you have probably noticed they have feeds you and every other visitor can subscribe to. If you are a webmaster, burning your site or blog’s feed allows you to automatically distribute your content to your subscribers even when they are not on your site.
If you use WordPress to power your blog, burning your feed and allowing your visitors to subscribe is a very easy process. I am going to show you how you can burn your blog’s feed using FeedBurner.
Why FeedBurner?
There are many reasons to use Feedburner, but the few that stand out include:
- Its free
- Access to statistics about your subscribers
- It enables your visitors to subscribe in different ways.
What Do You Need Before You Begin Setup?
Before you begin the process of signing up for FeedBurner’s service you need:
- A Google account. If you have Gmail, or any other Google service such as webmaster’s tools, analytics, or Google plus, then you are ready to go. If not, then you need to create a Google account.
- To locate your WordPress blog’s feed. You can locate your blog’s feed at “yoursite.com/feed” or “yoursite.com/rss”. You can try it now by typing clientflare.com/feed in your browser. If you have done this, then what you see is this blog’s feed in its XML format.
- Your RSS icon.
 To get your icon, go to Feed Icons and download whichever one you like.
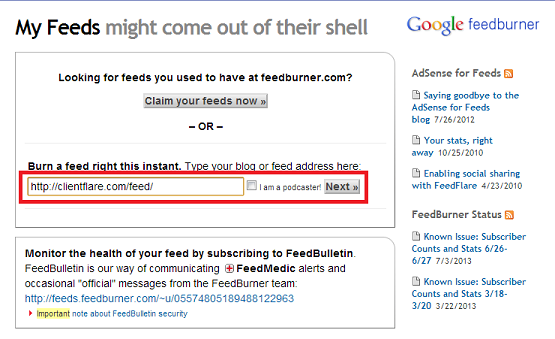
Step 1
Go to feedburner.google.com and enter your feed address. Once you have entered the URL for your feed click next.
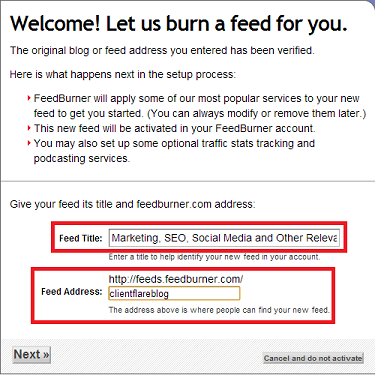
Step 2
Next you will need to choose a title, and address for you feed. Try to choose a title that matches the theme, copy, or tagline of your blog. The address you choose is your feed’s address on FeedBurner. This address is not the same one from the previous step. This is where your burned feed will be on the FeedBurner domain.
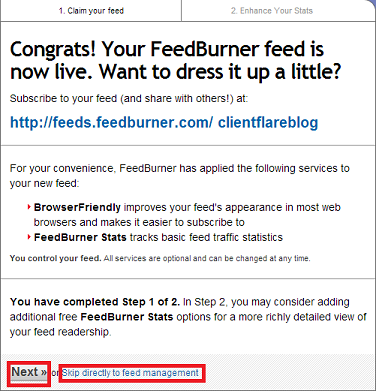
Step 3
If you completed all the steps so far, and everything went as it should then congratulations, your feed is now live! For this next step you can choose to skip directly to your feed’s management or click next and continue with the setup.
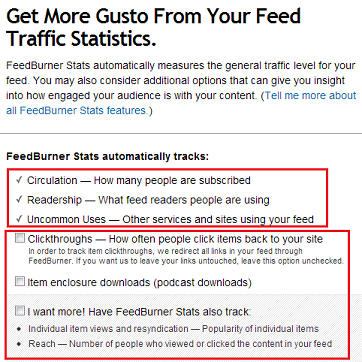
Step 4
In this step you have the choice to select additional stats you want to track in addition to the standard three FeedBurner automatically tracks. If you don’t want to select any of the options then click next.
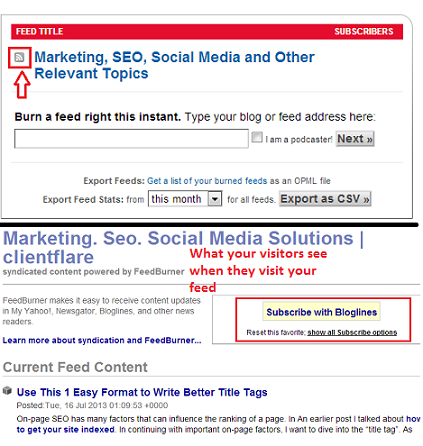
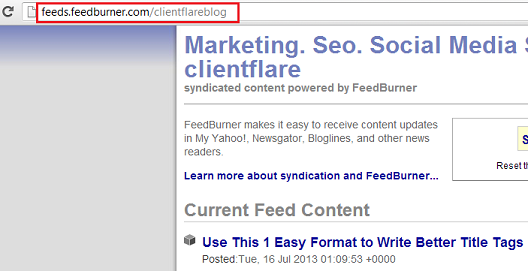
Step 5
Your setup is now complete. Go ahead and click on the RSS icon to test out your feed. There are two images I want to show you for this step. The first is how your feed appears to you after you have finished the setup and you are still logged in. The second image is how your feed will look like to your visitors and where they will be able to subscribe to your feed.
Step 6
The last thing you must do is copy your feed’s address and link to it from your site. Use the RSS icon you downloaded earlier as the image for your link. Remember to put your icon where your visitors can see it.
Have you burned your feed yet? Are your users missing your content when they are not on your site?
Leave a Reply